
UPDATE (4/20/13): As this post has been receiving a lot of traffic in recent months and Facebook has changed the procedure through which to create and manage Friend Lists since this post was originally written (09/11), I’ve decided to update the post to reflect those changes. Most of these changes are in the steps users need to take to create a List.
******
When Google+ launched two months ago, people went on and on about how amazing the Circles feature was, as if it was the coolest feature since sliced bread. Meanwhile, I grumbled (to myself and on Twitter and probably to anyone who was willing to listen to my grumbling) about the fact that Facebook had, in fact, rolled out this feature at least two years prior, and probably much earlier than that. The problem is that people (1) don’t know about Friend Lists, and (2) Friend Lists require a fair amount of fixed costs in terms of creating these Lists. For G+ users, on the other hand, they were able to throw all new contacts into appropriate Circles as soon as they added them to their network. It is worth noting that Facebook has made this process much, much easier in the last year or so, but the feature is somewhat buried in the site and Facebook has done little to promote the feature, even in the wake of G+’s launch in June.
Facebook has made a recent change, however, that you may have noticed. On your desktop or laptop, check out your News Feed and look below a status update, where you have the option to Like or Comment on a Friend’s post. You should now see one of these icons:


![]()
The top icon (the cogwheel) informs you that this post is shared with a Custom List. This could mean that the user has merely placed one or more Friends on a Limited Profile, or it could mean that you are on a Friend List that the user has created. The second icon (the silhouette of two people) means that the post was shared with all of that user’s friends. The third icon (a globe) means the post was shared publicly, meaning anyone can see it.
This is most likely a response to G+, which tells you whether posts are public (i.e., shared with anyone who visits the page), viewable by extended circles (think friends of friends), or Limited (this could be everyone the individual has placed in a circle or specific circles). G+ even tells you who those people are.

Facebook isn’t telling you who else can see those posts, only if they are going to everyone or some subset of their network. That said, this is once again making me question why Facebook does not feature Lists more prominently, especially if Circles is being used as a point of differentiation between the two sites. I know some people are using Lists–in my prelim research (conducted in April 2011), I asked participants (who were domestic grad students at MSU), “Have you created “Friend Lists” so you can post updates just to a subset of your Facebook Friends?” and 17% responded that they had. But I think more people would use Lists if they knew how, so I have finally decided to present a step-by-step walkthrough of the process for those who may not know.
Why would I want to post an update to a List?
Think if there are times when you wanted to post something to Facebook but stopped yourself because you thought, “I shouldn’t share that because Person X would see it and might not like it” or “I shouldn’t share this because it would only be relevant to a few friends.” These are examples of ways in which Lists can benefit you and help you get the most out of your network. For example, most of my Lists are based on geographic regions because sometimes I share information about an event or have a question that only locals would be interested in or have information about. For example, last week I was having problems with MSU’s Content Management System. I wanted to see if anyone else was having problems with the system, but this question was only applicable to a subset of my network so I only posted it to my “MSU” List.
The not-so-simple steps to set up Facebook Friend Lists
Now before I get into the (recently made much more complicated; /shakes fist angrily at Facebook) details, it’s important to note that Facebook has decided to use their handy algorithms to auto-create a few standard lists for you: “close friends,” “acquaintances,” and lists based on geography and affiliations like universities you’ve attended. You should be able to find these on the left side bar under “Favorites.” If you click on one of these lists, it presents you with a feed of content just from people included in this list. Look on the right side and in the top right of the page is a pulldown menu titled “Manage List.” This gives you three options: (1) Rename the list to something else, (2) edit the people who are on the list (the default popup screen shows people on the list and you can click the “X” in the top right to delete the person; alternatively you can change the view to all your friends and click on friends to add new people to the list; and (3) Choose update types, which allows you to select the type of content that appears in the feed. As an FYI, you can do this on a Friend-by-Friend basis by hovering over a Friend’s name, then hovering over the “Friend” button, then clicking on “Settings” (not complicated at all, right?!?). I regularly do this for Friends who post game updates, music updates, and other posts too frequently. On the right side of the List page, there is also a useful feature, “List Suggestions,” which may save you the time of scrolling through all your friends to see who should be added to the List (again, algorithm magic is at work here).

So that helps you with the Lists that Facebook has created for you. But what if you want to create a List from scratch? This has, unfortunately, become a bit more complicated in the last year or so. So follow these instructions and you should be set.
1. First, figure out what List you want to create (is it coworkers? local friends? soccer buddies?). Pick one of the Friends who will be on that List and go to their profile page.
2. On the right side, click on the wheel icon. You’ll see several options. Click on “Add to Interest Lists.”

3. Click “New List.”

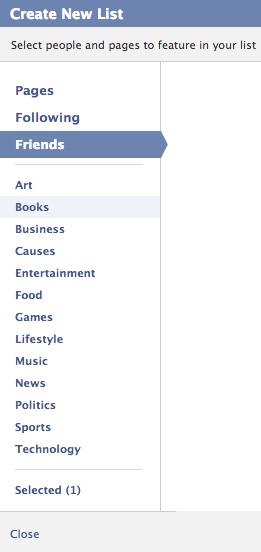
4. You now have a (unnamed) List with exactly one person on it. To add more people, select “Friends” and add additional people to the List. Then click Next. Here you’ll enter a List name (e.g., “Work Friends”), decide the visibility of that List (Public, Friends, or Only You), and create the List (by clicking Done). The visibility component is relatively new and reflects G+ in terms of giving you the option of allowing your Friends to see who else is on a given List.
It is important that when you accept new Friend requests, you remember to add those Friends to any appropriate Lists. Facebook makes this simple: once you “confirm” a Friend request, a button labeled “Add to List” will appear. Click on this and you are presented with a checklist of all your Friend Lists. Remember that you can also add friends to Lists by visiting the List page and adding through the Suggestions (as was noted above.

*IMPORTANT* There is another way to create a List that I thought Facebook had gotten rid of and only discovered after creating these new instructions (based on Facebook’s help instructions). It’s buried, as much of the information about Friend Lists are. However, on your home page, if you look on your left sidebar and scroll down, there should be a “Friends” section. If you hover over it, a “More” button should appear. Click that and it should show you all your Friend Lists. In addition, on the page there should be a “+ Create List” option, in which you enter the List name and start adding Friend names. This is the original way you would create Friend Lists.
Posting an update to a list
Now that you have created a Friend List, who do you use them? This is a relatively simple process as well. Return to your homepage or profile page. Click your cursor in the status update box and you will see a pulldown menu immediately to the left of the “Post” button. If you click on this, you will see a number of options, including: Public, Friends, Custom, and Only Me.

If you select Custom, a pop-up box will appear. Under “Make this visible to,” select “Specific People” from the pulldown menu. A text box will appear and you need merely type in the name of the List you have created. Alternatively, you can select individual people through this option. You can also block access to specific people or groups by entering a List or individual(s) in the “Hide this from” line. Select “Save Changes” and you are ready to post a Custom update!
Another important note is that with this recent change, Facebook also decided that it would retain your setting for all subsequent updates until you change it. So you need to be aware of what your settings are before posting so that you don’t accidentally send a post to the wrong group.
And that, my friends, is how to create and use the Friend Lists feature in Facebook. The existence and use of these kinds of features are central to many of my research questions, so I am always happy to talk about the pros and cons of using them. Feel free to ask questions or post comments below.

Pingback: Facebook Begins Testing Friend Filters in News Feed [PICS] | Circle Social Media Blog
Hi!
Love the article. I was thinking of using friends list to create circles like Google plus as you describe. I lecture across the country to groups of anywhere from 20 to 200 people at a time. I am a specialist in special ed technology.
Recently I began to think about using circles for the groups that I speak to. I figured that the people that attended my lectures had something in common, me! And of course the content of my lectures 😉
Part two
So I figured these people would benefit by being in contact with each other! And that’s why I started investigating circles. But Facebook is so much better known and more used then Google plus. And it’s still quite trendy to use Facebook, for people over 30 years old just getting started with it. It makes us feel sort of cool.
Could you tell me if people in a friends list can communicate freely with each other?